Scratch removal for cars at home Without Haze
At home, only treat scratches that do not catch a fingernail; start with washing, then a mild polish or scratch remover, and stop once the mark is reduced without haze. Going more aggressive than needed can add swirl marks, leave dull spots, or remove too much clear coat. This guide covers scratch-depth checks, the least-aggressive product ladder, safe hand-polishing steps, and the warning signs that mean DIY should stop.
Modern paint usually has three layers: clear coat on top, the color coat below it, and primer under that. Light swirl marks and faint scuffs are often only in the clear coat, so they are the best candidates for home correction. Once the scratch exposes a color change, white or gray primer, or bare metal or plastic, polishing is no longer the right tool, and touch-up paint or outside repair is the safer path.
What scratch removal at home can and cannot fix
Best DIY candidates
Home correction works best on small, light marks in the top transparent layer. That includes wash swirls, faint scuffs from bags or clothing, and shallow scratches that look lighter from some angles but do not show a different paint color underneath.
These defects often respond to hand work because you are leveling or masking a very small amount of clear-coat texture, not replacing missing paint. Scratch remover and polish are meant for this range. Some scratch removers cut lightly, some rely more on fillers, and some do both, so a better result right after wipe-off is not always a lasting one.
Usually beyond polishing alone
If the scratch shows a different color than the surrounding paint, the mark has likely gone past the clear coat and into the base coat. If it shows white or gray, that is often primer. If it shows metal or black plastic, the defect is deeper still. Those are touch-up or refinish jobs, not simple polishing jobs.
A fingernail catch is only a rough clue, not a rule. Some clear-coat scratches catch lightly and still improve. The safer rule is visual: if polishing causes color transfer on the pad, reveals primer, or leaves the spot duller than the surrounding paint, stop.
Why the mildest method comes first
Clear coat is the sacrificial layer, but there is only so much of it. Every abrasive step removes material, and removal happens fastest on raised body lines, panel edges, and repainted areas where film build may already be uneven. Starting with polish or a mild scratch remover lets you see what the defect really is before you reach for compound, which lowers the risk of haze, uneven gloss, or a thin patch that stands out more than the original scratch.
What you’ll need
- Car wash soap, two buckets or a rinse method, and clean wash media
- Clay bar or a paint-prep decontamination product with lubricant
- Clean microfiber towels, several, with separate towels for wipe-off and final inspection
- Foam or microfiber applicator pads for hand work
- Inspection light, bright LED flashlight, or strong indirect daylight
- Mild scratch remover
- Car polish
- Rubbing compound for heavier clear-coat defects only
- Masking tape for protecting nearby trim, badges, or sharp panel edges
- Optional touch-up paint matched to the vehicle paint code
- Optional panel wipe or isopropyl-alcohol-based paint prep to remove waxes and fillers before inspection
- Nitrile gloves if using solvents or touch-up paint
You do not need a large kit. You need clean wash tools, a way to decontaminate the paint, separate towels for residue and inspection, and one mild correction product to start. Keep compound in reserve for confirmed clear-coat defects that did not respond to polish, and keep masking tape nearby because trim, badges, and sharp edges are easy places to cause accidental damage.
How do you tell how deep a car scratch is?
Wash the panel, remove bonded contamination, and inspect under a strong light before deciding anything. Dirt, wax, and fallout can make a shallow mark look deep. A scratch limited to the clear coat usually keeps the same body color underneath, while exposed color coat, primer, or bare substrate means polishing alone will not solve it.
Inspect after the paint is actually clean
Washing matters because trapped grit can hide the true defect and create new marring during correction. Decontamination matters for the same reason. If the panel still feels rough after washing, bonded fallout can catch under the applicator and make a light defect act deeper and more stubborn than it really is.
Use clay or paint prep after washing, then dry with a clean microfiber towel. After that, wipe the area once with a paint-safe prep wipe if wax or sealant may be present. Old protection can fill a mark and give a false reading, or it can keep abrasives from contacting the paint evenly, so inspect only after the residue is gone.
Clear-coat-only clues
Light clear-coat marks often look white or silver only from certain angles because the scratch is scattering light in the top layer. The surrounding color still matches. Swirl marks almost always live here, and many faint scuffs do too.
Suppose a black door has a 2-inch mark from a backpack zipper that looks bright in direct sun but disappears when viewed from the side and does not show a different color inside the line. That is a strong sign the defect is in the clear coat.
Base coat, primer, and stop signs
If the line looks darker or lighter than the body color in a way that does not change with viewing angle, the scratch may have reached the base coat. Color-match issues start here. If the line is white or gray, primer is likely exposed. If it is metallic silver on a non-silver car or black plastic on a bumper cover, the damage is deeper than surface correction.
Stop DIY polishing if any of these appear during inspection or after a test spot:
- Color transfers to the towel or applicator
- White or gray underlayer is visible
- Bare metal or plastic is visible
- The spot turns duller while the scratch line stays put
Picture a red fender with a 1-inch scratch near a body line. After one careful test pass, the towel shows red pigment. That points to exposed base coat or a thin repaint, and more rubbing risks going through even more of the finish.
Scratch triage decision table
| Visible clue | Likely layer involved | Safest next step | Rough DIY or repair cost | Effort | Stop-rule |
|---|---|---|---|---|---|
| Fine swirl marks, faint haze, no color change in the line | Clear coat only | Car polish by hand | $15-$30 | Low | Stop if gloss drops or nothing changes after 2 short passes |
| Light isolated scratch, visible in sun, same body color underneath | Clear coat only or mostly clear coat | Scratch remover or mild polish | $15-$40 | Low to medium | Stop if the line catches more after cleaning, or the area starts to haze |
| Heavier clear-coat mark, still no exposed color or primer | Deeper clear coat | Rubbing compound, then polish | $20-$50 | Medium | Stop if compound leaves a dull patch that polish does not clear quickly |
| Scratch shows a different paint color in the line | Base coat / color coat exposed | Touch-up paint matched to paint code | $25-$70 | Medium to high | Stop polishing; do not chase depth with more abrasion |
| White or gray line, or black plastic / bare metal visible | Primer or substrate exposed | Touch-up for small chips, or professional repair on visible panels | $25-$70 DIY; $300-$1,000+ professional | High | Quit home correction if the area is on a hood, roof, body line, or larger than a credit card |
| Large damaged area, edge, badge area, or unknown repaint thickness | Uncertain | Professional inspection and repair | $300-$1,000+ | High | Do not compound by hand across edges or fresh repaints of unknown thickness |
Should you use scratch remover, polish, or rubbing compound?
Use the least aggressive product that matches the defect. Polish fits swirls and very light marks, scratch remover fits slightly more visible clear-coat scratches or temporary masking, and rubbing compound fits heavier clear-coat defects that still have no exposed color or primer. If the scratch is through the clear, touch-up paint is the better path.
Where scratch remover fits
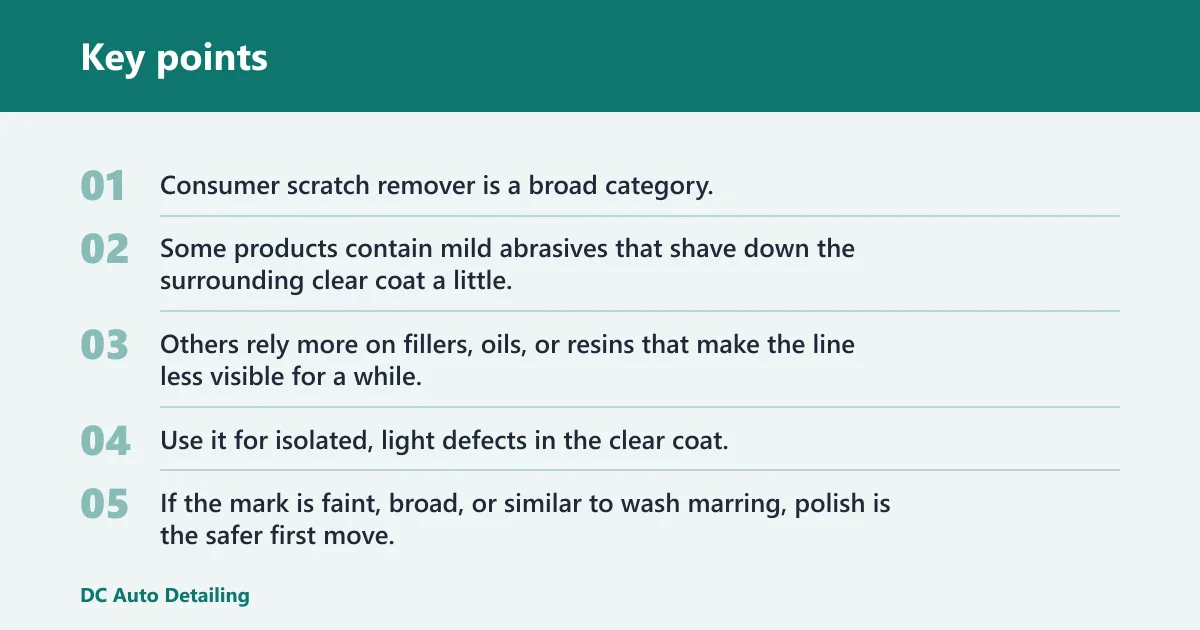
Consumer scratch remover is a broad category. Some products contain mild abrasives that shave down the surrounding clear coat a little. Others rely more on fillers, oils, or resins that make the line less visible for a while. That is why one product may look good right after wipe-off but weaker after the next wash.
Use it for isolated, light defects in the clear coat. It is not the right answer for primer-deep damage, and calling it a deep-scratch fix usually leads to over-rubbing.
When polish is enough
Car polish is less aggressive than compound. It is meant for fine defects, gloss restoration, and refining a finish after a stronger step. If the mark is faint, broad, or similar to wash marring, polish is the safer first move.
Polish also matters after compound. Compound can flatten a scratch edge but leave a cloudy patch. Polish refines that haze and brings gloss back closer to the surrounding panel.
When compound is warranted
Rubbing compound has more cut than polish. Use it only when inspection shows a clear-coat defect that a mild polish or scratch remover did not improve, and keep the work area small. By hand, that usually means a spot around 2 by 2 inches, not half a door.
Compound is more likely to leave haze, especially on dark paint. It should usually be followed by polish. If the scratch line survives but the shine drops, the defect is telling you it is too deep or the product is too aggressive for the remaining finish.
When touch-up paint is the better option
Touch-up paint is for missing paint, not for leveling harmless surface marring. Once base coat or primer is exposed, the goal changes from abrasion to coverage. Color match matters, and metallic colors can look different depending on flake orientation, so even a correct paint code can vary a bit.
Touch-up also needs cure time. After it cures, some owners lightly level and polish the repair, but that is a separate job from scratch removal and carries its own risk.
How do you remove light car scratches by hand?
Hand correction is safest on a small, clean area using a foam or microfiber applicator, light to moderate pressure, and short work cycles with inspection after each pass. Start with polish or mild scratch remover, wipe with a clean microfiber towel, and stop when improvement stalls or the spot begins to look hazy.
Hand correction steps
- Wash the panel. Clean the area with car soap and rinse well so loose grit does not become a fresh scratch. Dry with a clean microfiber towel, especially around the defect and its edges.
- Decontaminate the paint. Use clay or paint prep with lubricant until the area feels smooth. This removes bonded fallout that can drag under the pad and makes the scratch easier to read under light.
- Mask nearby edges. Tape off trim, badges, sharp creases, and panel edges within a few inches of the scratch. Those areas are easier to mar and should not be the target of hand polishing pressure.
- Inspect under bright light. Look straight on and from an angle with an LED light or strong daylight. Confirm that the mark appears limited to the clear coat before any rubbing starts.
- Prime the applicator. Put 3 pea-sized drops of polish or scratch remover on a clean foam or microfiber applicator pad. More product than that usually reduces control and can hide the defect with residue.
- Work a small section. Rub only a 2-by-2-inch area centered on the scratch using overlapping back-and-forth passes, then up-and-down passes. Keep pressure light to moderate and limit each cycle to about 20-30 seconds.
- Wipe and inspect. Remove residue with a separate clean microfiber towel, then inspect before deciding on another pass. This is where most over-correction is avoided: if the mark improved, repeat only if the finish still looks clear and glossy.
- Add product in measured increments. If the pad starts to feel dry, add 1 pea-sized drop, then recheck after the next short cycle. Do not flood the area; too much product can reduce cut and hide what the paint really looks like.
- Refine if needed. If a stronger scratch remover or compound was used and the area looks slightly dull, switch to polish on a fresh applicator. Work another short cycle, then wipe and inspect again.
- Protect the finish. Once the result is acceptable and the area is clear, apply wax or sealant after any prep-wipe residue is gone. Protection will not remove the scratch, but it helps the corrected area shed grime and stay easier to inspect later.
Say your silver trunk lid has a faint 1.5-inch scuff from a grocery bag. After washing and claying, two short polish cycles reduce it by about half and the gloss stays even. That is the point to stop or make one more mild pass, not jump to compound.
What if the scratch is still visible after a couple of passes?
If a clear-coat scratch still looks nearly the same after one or two controlled attempts, assume the product or diagnosis is wrong before assuming more pressure will fix it. Reinspect for wax, oxidation, contamination, exposed color, or a heavier clear-coat defect, then either refine, step up one level, or stop and change repair methods.
If that didn’t work, try this next
- Strip residue and recheck. Wipe the area with paint prep or an alcohol-based panel wipe, then inspect again under strong light. Filler-heavy scratch remover can make progress look better than it is, and old wax can make a product seem weaker than it is.
- Check for contamination. If the paint still feels rough, clay the area again and retest with polish. Bonded fallout and oxidation often cause a false negative by blocking even contact between the abrasive and the defect.
- Switch to polish first. If the first product was a filler-heavy scratch remover, try a true finishing polish on a fresh pad. This shows whether the mark is really improving or was only being masked.
- Step up to compound once. If inspection still shows a clear-coat-only defect and polish did little, use rubbing compound for one short cycle on the same small spot. Wipe, inspect, and follow with polish if the area turns slightly cloudy.
- Stop at the first warning. Quit if the scratch does not improve, if pigment transfers to the towel, or if the spot grows duller than the surrounding paint. More rubbing after that usually removes good clear coat without removing the actual defect.
- Change repair path. Move to touch-up paint if the scratch clearly exposes base coat or primer. Move to professional repair for deep gouges, large damaged sections, edges, body lines, or fresh repaints of unknown thickness.
Why scratch remover may seem ineffective
There are several common reasons. The scratch may be deeper than expected. The product may rely more on fillers than abrasives. The panel may still have wax, sealant, oxidation, or contamination that blocks real contact. Or the defect may be broad marring that needs polish rather than a spot scratch product.
A common first-timer mistake is rubbing harder when the line stays visible after the first pass. On a dark hood, that can leave a 3-inch dull patch around a scratch that was already through the clear. The scratch remains, and now the area needs polishing too.
Common mistakes
Using the wrong product for the defect
Scratch remover, polish, and compound are not interchangeable. Using compound on a faint scuff can create haze. Using a filler-heavy remover on exposed primer wastes time because missing paint cannot be abraded back into place.
Skipping decontamination
Washing alone does not remove bonded fallout. If the panel is still gritty, the applicator can drag contamination across the paint and add fresh marring. Clay or paint prep before correction changes both the diagnosis and the safety of the process.
Using dirty towels or pads
Microfiber towels and applicator pads need to be clean, soft, and free of dried product or debris. One speck of grit can turn wipe-off into scratch creation. Use separate towels for residue removal and final inspection.
Overworking the spot
Long, aggressive rubbing is where many DIY jobs go wrong. Short cycles with inspection between them are safer because they show whether the defect is actually responding. If the finish gets cloudy or the gloss drops first, stop there.
Polishing dangerous areas
Do not work across dirty panel edges, badges, sharp body lines, or uncertain repaint edges. Paint is often less forgiving there, and hand pressure naturally concentrates on high spots.
Prevention
Use clean wash media, plenty of rinse water, and dedicated drying towels to reduce the light clear-coat marring that most often sends owners looking for scratch removal for cars at home. A protected, clean panel is easier to inspect and less likely to pick up fresh swirls during routine washing.
Frequently asked questions
How much does car scratch removal cost?
For light clear-coat correction by hand, common DIY material cost is about $15-$40 if polish or scratch remover is the main fix. Small touch-up paint jobs often run about $25-$70 in materials. Professional repair varies widely, but visible-panel refinishing commonly starts around a few hundred dollars.
Can I remove car scratches at home without damaging the clear coat?
Yes, if the scratch is shallow, the area is washed and decontaminated first, and the process stays mild and short. Use polish or a mild scratch remover on a small spot, inspect after each pass, and stop if haze appears, progress stalls, or any color transfers to the towel.
How do I tell if a scratch is just in the clear coat or through the paint?
After washing and clay or paint prep, inspect under bright light. A clear-coat mark usually leaves the body color unchanged beneath the line and often shifts with viewing angle. A through-paint scratch shows a different color, white or gray primer, or bare metal or black plastic.
Why isn’t scratch remover working on my car?
Common reasons are wrong diagnosis, old wax or sealant on the panel, bonded contamination, oxidation, or a product that mostly masks defects. Strip residue with a prep wipe, recheck the scratch under strong light, and switch to polish, compound, touch-up paint, or outside repair based on what the line actually shows.
When is a scratch too deep for DIY repair?
A scratch is usually too deep for home polishing when primer, substrate, or clear color change is visible, when pigment transfers to the applicator, or when the panel edge or body line is involved. It is also time to stop if one or two careful attempts only make the spot duller.